How to create your first Virtual Machine on AWS for free?
This article is for beginner only and it will show you how to make a Linux Virtual Machine on Amazon Web Services and how to connect and manage your instance.
Amazon is calling their virtual machines EC2, stands for Elastic Cloud Computing.
To create EC2 instances is very easy but it’s important to follow some guideline and we will cover that on this article.
AWS free Account
Amazon is offering 12-months free tiers to all customers to explore and learn their cloud environment. You will not have access to all their services and you will have few limitation but it will be more than enough to make your lab environment.

You have by example access to small-size EC2 instances ( 1 vcpu and 1 Gb of ram) for a limit of time by month.
💭 when your instances will be off, it will not count.
You can see the Free Tier details on this page: AWS free tier
First, you will need to make your free account:
It will require your Email, Phone Number, and Credit/Debit card details, even if the account is free, if you are not using the free-tiers services and you use more than the limit, you’re going to start getting charged for it.
So, you will need to really take care of what type of EC2 you are deploying and service you will use as Aws can charge you and can charge you a lot !
From Aws documentation, the creation of your account can take few minutes to few hours to be approved but I made few accounts on AWS and it was always taking around 5 minutes.
Create your first EC2 instances
Let’s create our first virtual server, I mean first EC2 instances 😄
EC2 was one of the first service provided by AWS and it’s the most used with S3.
![]()
After the creation of your account, connect to the console, you will find all the services provided by AWS from the service screen.
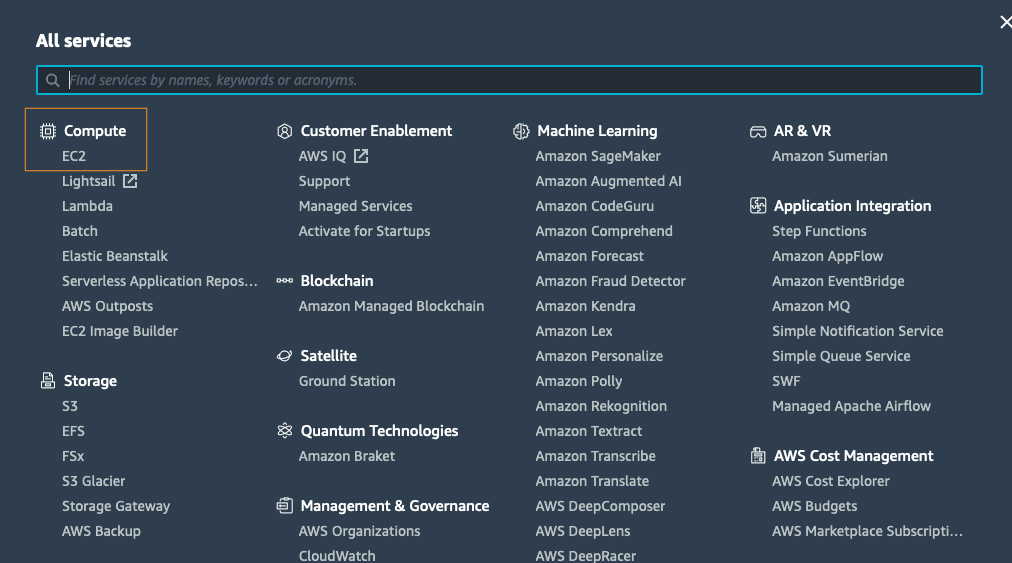
From the EC2 screen, you will be able to manage your EC2 instances, your AMI ( images or template ), snapshot, volumes, network, scaling group , load balancers and so on.
Before creating your virtual machine, you need to choose the region where you will create your virtual machine.
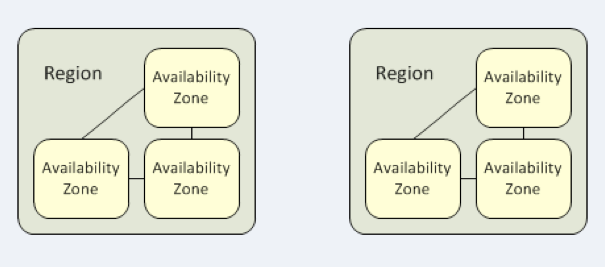
What is a region and how to choose the right region for your EC2 instance ?
A region is a physical location containing at least 3 Availability Zone or AZ.
An AZ is one or more data centers with redundant power, networking, and connectivity in an AWS Region.
Each AZ are physically separated by at least 100 km of each other.
Basically, for testing purpose, you will take the region the closest from where you are.
If you want to make a website by example, you will choose the region from where the biggest part of your customers are connecting.
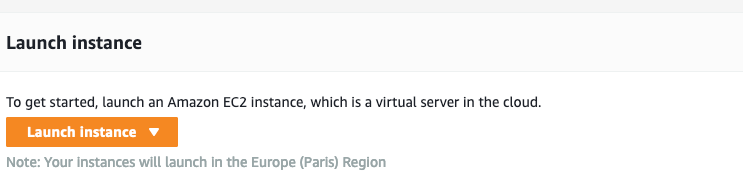
You can choose the region from the top right corner of the console.
Now, it’s time to make your EC2 instance.
Choose your AMI ( Amazon Machine Image ) follow the OS that you want and check that is free tier eligible if you don’t want to have additional charge.

In our case, we will choose Ubuntu Server 20.04 LTS. Then, you will have to choose an instance Type.
The only one ‘free tier eligible’ is the t2.micro or t3.micro follow the regions you are using, which has 1 or 2 Vcpu and 1 Gib of Memory.
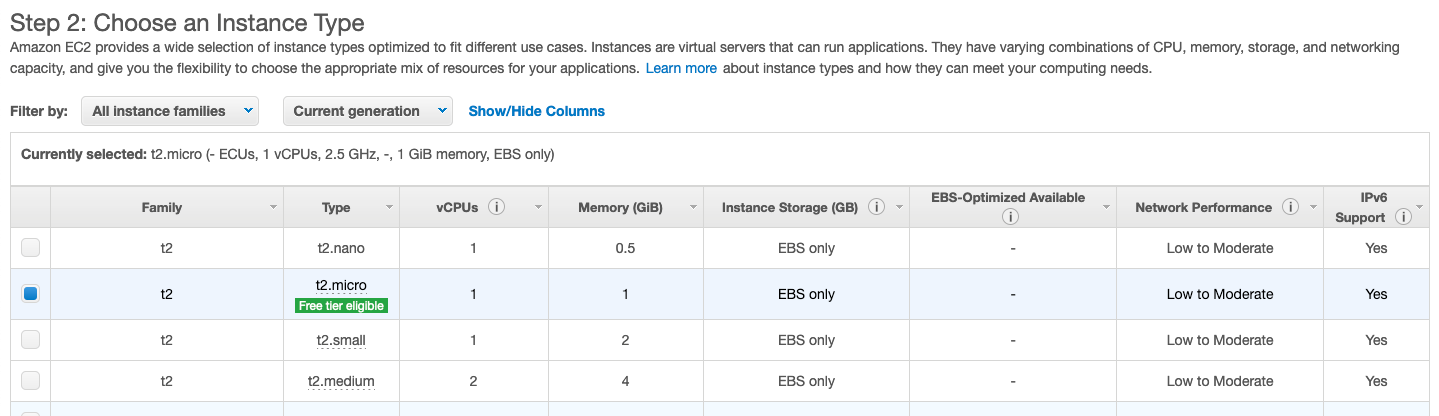
There are various configurations of CPU, memory, storage, and networking capacity for your instances, known as instance types.
You can find more information on this link : Aws instance type
Then, you can review and launch directly or you can change settings for your instance as network settings, storage, security, etc…
On the Review Instance Launch page, under Security Groups, you’ll see that the wizard created and selected a security group for you.
You can use this security group, or alternatively you can select the security group that you created when getting set up using the following steps.
Basically, a security group is a firewall on the EC2 layer.
By default, everything, all rules are denied on inbound and everything is allowed on outbound. Then, by default, AWS will create a default security groups to allow ssh, you can restrict for only your public IP address to make it more secure, it’s hardly recommended if you have a static public IP address.
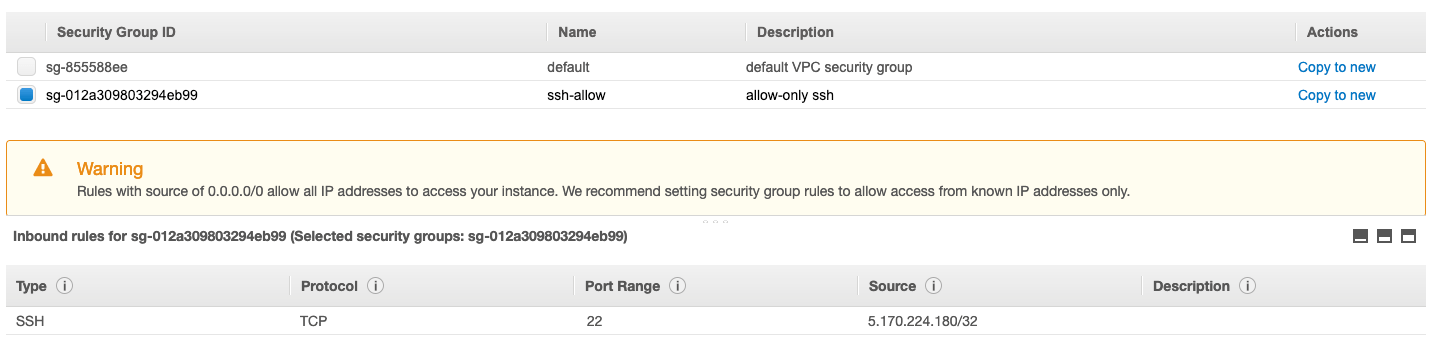
You can attach more than one security group and it’s recommended to make a specific one for ssh.
Another best practice is to implement the least permissive rules for your security group, only open the ports that you only need.
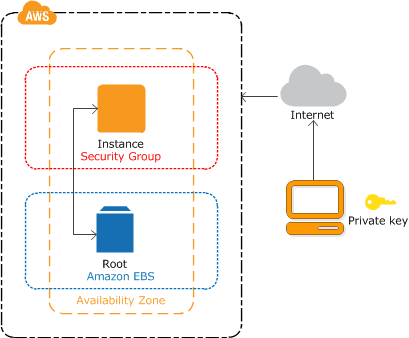
Connect to your EC2 instance
Once you have specified your security group and open ssh port, you need to specify a ssh key pair and download the private ssh key as you must specify the private key of the key pair to connect to your instance.
:info: A key pair, consisting of a private key and a public key, is a set of security credentials that you use to prove your identity when connecting to an instance. As AWS doesn’t keep a copy of your private key, there is no way to recover a private key if you lose it, and anybody will be able connect to your vm if they have your private key, so keep them safe.
💭 If you launch your instance without a key pair and you didn’t open port ssh (22), then you can’t connect to it by ssh.
To connect by ssh to your instance from Linux, MacOs or last update of windows 10, you will need to specify your ssh private key from your terminal as below :
ssh -i /path/my-key-pair.pem my-instance-user-name@my-instance-public-dns-name
The user will be different follow the AMI that you have chosen but you can have more information on the connect section of your ec2 instance.
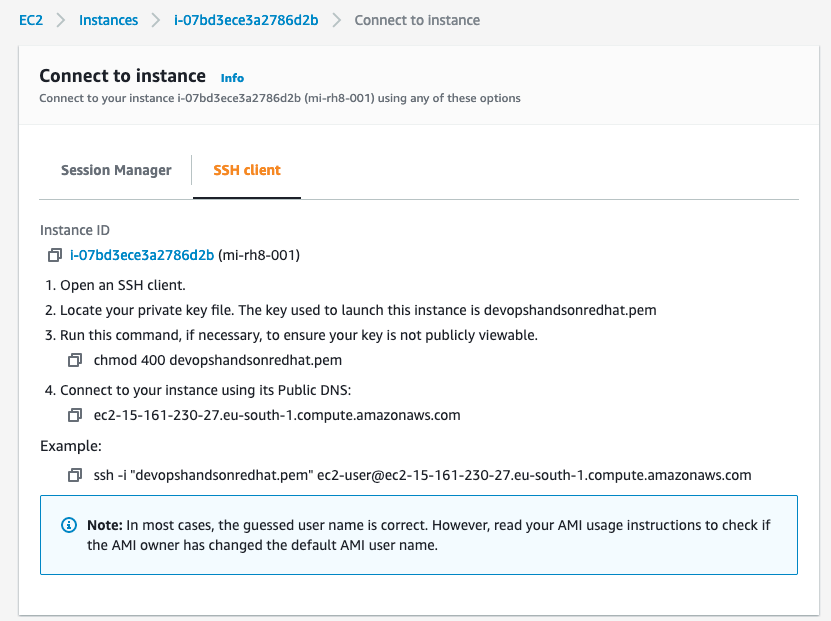
💡 The ssh private key has to have permission 400 ( read only for root user).
chmod 400 my-key-pair.pem
To keep organized your ssh connection on Linux and MacOs, you can define alias and key for all your servers on your ssh config file as below :
vim .ssh/config

# Required to keep alive your connection on AWS
Host *.compute.amazonaws.com
TCPKeepAlive yes
ServerAliveInterval 120
ServerAliveCountMax 5

# Specify the alias
Host aws-red8
# Specify the DNS or the public IP of your ec2 instance
Hostname ec2-15-161-10-100.eu-south-1.compute.amazonaws.com
# Specify the user to connect
User ec2-user
# Specify the private key provided by AWS
IdentityFile  ~/.ssh/devopshandsonredhat.pem
Then, you will be able to connect to your server using only the alias:
ssh aws-red8
Another way to connect is using the Aws System Manager.
Aws Manager is a centralized fully-managed aws service where you can manage all your EC2 instances, on-premise instance and other VM on different cloud.
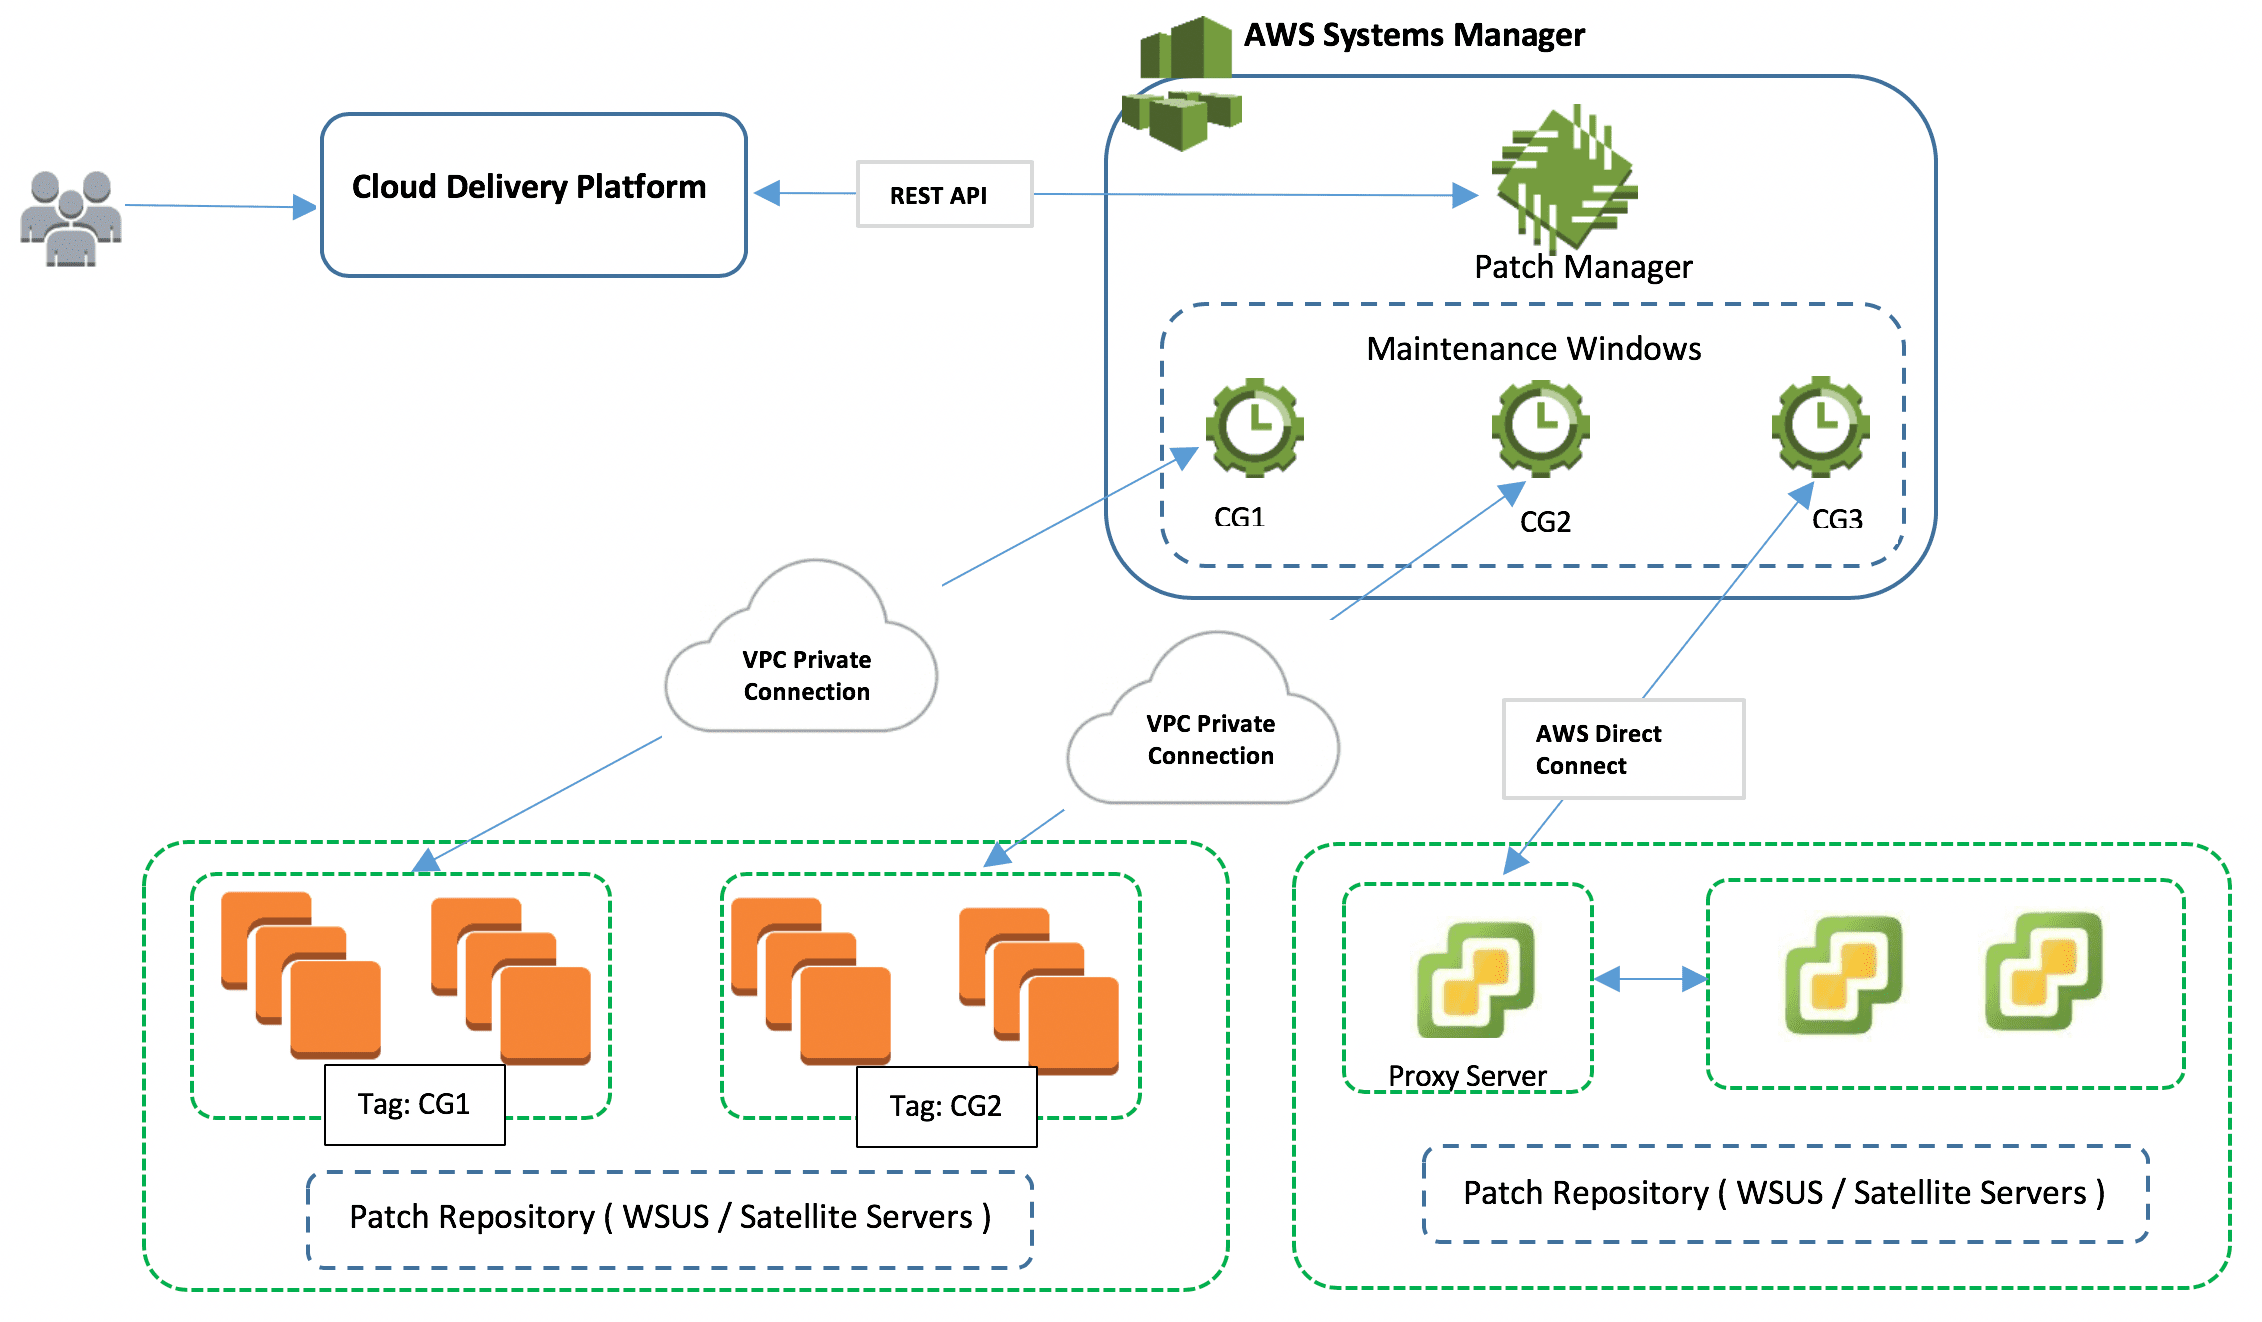
Using Session Manager, you will not need to open ssh port and manage any ssh keys. It will be easy using IAM Policies to control who can connect.
Moreover, Aws CloudTrail will record each login information and stored on S3.
You can then be notified using cloudwatch and SNS.
What are the advantages of using SSM instead of SSH directly ?
- Improve of security and improve operational overhead.
- Ability to track and record access and activity ( Logging and Auditing easier)
- Easier for Administrator to grant and revoke access
- User can connect in one click from browser or from aws-cli
- Ability to provide temporary access to your instance
- Easy configurable shell profile
To use Session Manager, your EC2 instance must have SSM agent installed.
💭 SSM Agent is preinstalled on the following Amazon Machine Images (AMIs):
- Amazon Linux
- Amazon Linux 2
- Amazon Linux 2 ECS-Optimized AMIs
- Ubuntu Server 16.04, 18.04, and 20.04
- macOS 10.14.x (Mojave) and 10.15.x (Catalina)
- Windows Server 2008-2012 R2 AMIs published in November 2016 or later
- Windows Server 2016 and 2019
If your EC2 instance is not using these AMI, you will need to install the SSM agent following these procedures : Installed SSM Agent
Then, to use AWS Manager on EC2, you will need to make a new role with the policy AmazonSSMManagedInstanceCore and attach to the EC2 you want to manage.
First create the new role as below :
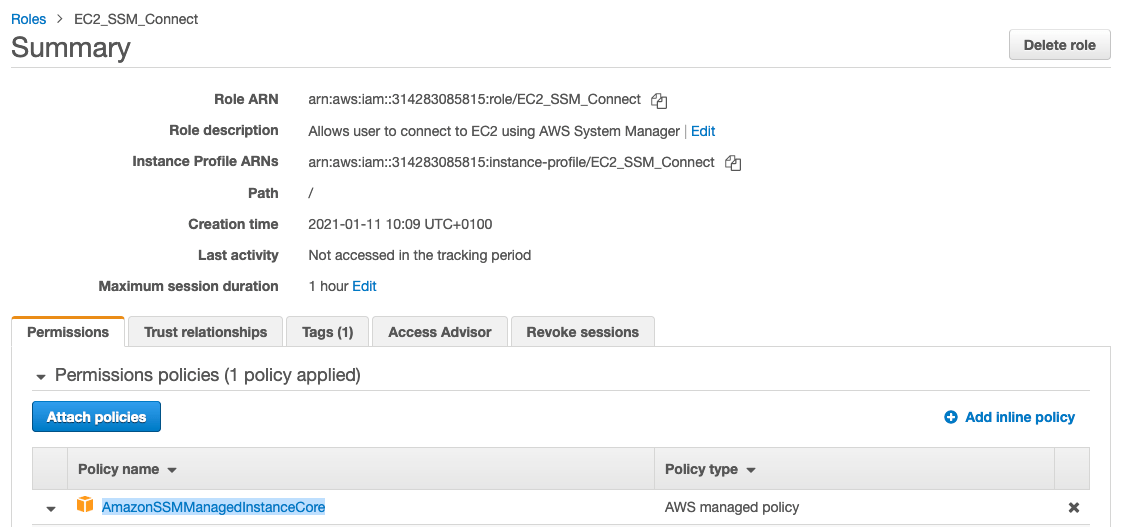
Once the role is created, you will need to attach the role to your existing EC2 instance or attach it during the creation.

Finally, you will be able to connect directly from AWS System Manager to your ec2 instance.
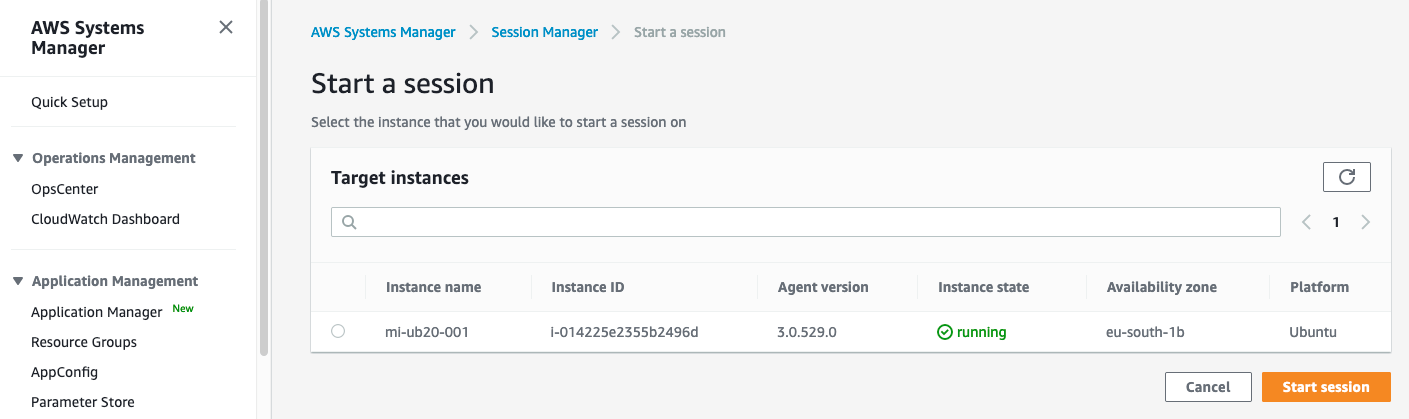
If you have already configured your aws cli, you will be able to connect from the cli :
aws ssm start-session --target <instance id>