Start with AWS Cloudformation and make your first project
What is CloudFormation ?
AWS CloudFormation is an amazing AWS free service to provision automatically your Infrastructure on AWS.
CloudFormation is like Terraform as it’s a fantastic IAC (infrastructure as code) tool but CloudFormation is confined only for AWS and in the opposite, Terraform is platform agnostic and support many cloud, software, DB, …

Big benefit of Infrastructure as code is that resources are not manually created and you have all benefit you have using code, as versioning, sharing, self documenting and so on.
Basically, You will declare as code the AWS Infrastructure you want to provision and AWS will deployed/destroyed everything for you in one run/command and you can make a dry-run or simulation to see what change will be done. Amazing ? Right ?
Cloudformation handles the configuration in a JSON or YAML format, called template.
In your template, you will define what type of resources you want ( most of them are supported), by example :
- An EC2 instance
- A security group
- An S3 Bucket
- A Load Balancer
- …
A template is then deployed creating a “stack” and CloudFormation will create those for you in the right order (manage dependencies) with the exact configuration that you specify.
Moreover, You will have the ability to destroy and re-create the Infrastructure on AWS on the fly.
CloudFormation Template Structure
The overall structure of your Yaml Template will be as below:
---
# Version date : "2010-09-09"
AWSTemplateFormatVersion: "version date"
Description:
  String

Metadata:
  template metadata

# Where you define variable
Parameters:
  set of parameters

Rules:
  set of rules

Mappings:
  set of mappings

Conditions:
  set of conditions

Transform:
  set of transforms

Resources:
  set of resources

Outputs:
  set of outputs
Only the part “Resources” is required but it’s recommended to fill the Description fragment to comment and describe the purpose of the template.
Description: >
  This template is
  amazing and do
  nothing.
At this time, the latest template format version is 2010-09-09 and is currently the only valid value. If you don’t specify a value, the latest template format version will be assumed.
AWSTemplateFormatVersion: "2010-09-09"
The Parameters section will be use to make your CloudFormation script more reusable and dynamic as this section is used to customize your template using input custom values.
By example, you can define a Variable or Input value for the Instance Type that you will be able to change follow your need making your script more dynamic.
Parameters:
  InstanceTypeParameter:
    Type: String
    Default: t2.micro
    AllowedValues:
      - t2.micro
      - t2.nano
    Description: Enter t2.micro,t2.nano. Default is t2.micro.
You can see directly the purpose of using parameter in this example and it’s recommended to use parameters section to make your template not static but more dynamic and easily reusable.
To reference a variable defined in the Parameters section, you will use the Ref Function which is described in the next section.
Ec2Instance:
  Type: AWS::EC2::Instance
  Properties:
    InstanceType:
      Ref: InstanceTypeParameter
    ImageId: ami-0d712b3e6e1f798ef
✔️ All the Parameter must have a unique logical Name.
Each parameter must be assigned a parameter type supported by AWS and define on this documentation
The Default Value is optional but it’s useful if you don’t want to specify each time a value.
The Minimum Value for the parameter:
Parameters:
  ParameterLogicalID:
    Type: DataType
    ParameterProperty: value
The outputs section allow you to print useful values from the created resources.
Outputs:
  WebSiteUrlWebApp:
    Description: 'URL for website hosted on S3 - to test permission - only access from Origin'
    Value: !GetAtt S3BucketWebHelloWorld.WebsiteURL
Functions

Aws CloudFormation has few very useful functions as by example:
-
Ref: returns the value of the specified parameter or resource. (Reference to a Resource)
You will use a lot this function to refer to the other resource.
#Syntax for the full function name:
Ref: logicalName
#Syntax for the short form:
!Ref logicalName
- Sub: substitutes variables in an input string with values that you specify.
It’s useful by example to create an ARN follow your region and your AWS account:
!Sub 'arn:aws:ec2:${AWS::Region}:${AWS::AccountId}:vpc/${vpc}'
- Condition Function: There are few function to conditionally create your resource
- Fn::And - !And
- Fn::Equals - !Equals
- Fn::If - !If
- Fn::Not - !Not
- Fn::Or - !Or
You define all conditions in the Conditions section of a template except for Fn::If conditions.
You can use by example condition if you want to use different Instance Type follow your environment Type that you will define in your Input parameters.
AWSTemplateFormatVersion: "2010-09-09"

Mappings:
  RegionMap:
    us-east-1:
      AMI: "ami-0533f2ba8a1995cf9"
    us-west-1:
      AMI: "ami-0d712b3e6e1f798ef"

# Input Value
Parameters:
  EnvType:
    Description: Environment type.
    Default: test
    Type: String
    AllowedValues: [prod, dev, test]
    ConstraintDescription: must specify prod, dev, or test.

Conditions:
  CreateProdResources: !Equals [!Ref EnvType, "prod"]
  CreateDevResources: !Equals [!Ref EnvType, "dev"]

Resources:
  EC2Instance:
    Type: "AWS::EC2::Instance"
    Properties:
      ImageId: !FindInMap [RegionMap, !Ref "AWS::Region", AMI]
      InstanceType: !If [CreateProdResources, t2.small, !If [CreateDevResources, t2.micro, t2.nano]]
All the function provided by AWS are described on their documentation
How to deploy cloudformation stack?
You can deploy a CloudFormation Template in two ways:
- Launch it from the AWS CloudFormation Stack console
- Launch it from the command-line using the AWS CLI
We will focus on the latest as I’m not a big fan of GUI and CLI is faster and better in term of automation.
First of all, you will need programmatic access to AWS and need to configure your computer to be able to access from CLI to your AWS Account.
You can follow this procedure from my article about Terraform.
Once, everything is configured and installed, you will be able to use the AWS CLI to deploy your new freshly amazing CloudFormation Stack.
aws cloudformation create-stack --stack-name superman-app --template-body fileb://devopstemplate.yml
To deploy the stack in a specific region or with a different profile, use the region or profile argument (You can define credentials and region in your AWS profile)
aws cloudformation create-stack --stack-name superman-app --template-body fileb://devopstemplate.yml --region us-east-1

aws cloudformation create-stack --stack-name superman-app --template-body fileb://devopstemplate.yml --profile NameOfYourProfile
If you don’t want to add the argument profile, you can export the profile variable in the current shell. Notice that this will not be permanent and you will need to do again if you are closing your shell.
export AWS_PROFILE=NameOfYourProfile

# No need to specify profile argument anymore
aws cloudformation create-stack --stack-name superman-app --template-body fileb://devopstemplate.yml
Description project
Host a simple “Hello World” HTML page. This page should be fronted by an AWS Cloudfront distribution.
You can get all the code for this project and other small fun project on my github repo
Few explanation before coding the cloudformation template.
Cloudfront is used for caching and will act a proxy between the user and your bucket, it will be used as well as a https forwarder.
You code will be cached on the different edge location, close to your end-user to minimize latency.
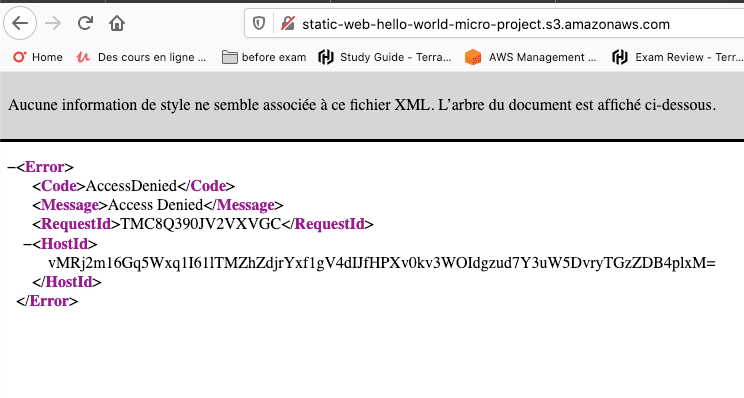
The user will not be able to access directly your S3 bucket as you will only permit the cloudfront to have access to it using “Origin Access Identity” or OAI.

Let’s focus on the code step by step but if you want you can go directly on the final solution on my repository
AWSTemplateFormatVersion: '2010-09-09'
Description: "Static Website using cloudfront and S3"

Parameters:
  S3BucketNameWeb:
    Type: String
    Default: "static-web-hello-world-micro-project"
    MinLength: 3
    MaxLength: 63
One input variable is defined with a default value, if default is not provided, the Input value must be filled or pass as an argument during deployment.
📝 The Bucket Name has to be globally unique
Than, the section resources will define the infrastructure you want on AWS:
You will need:
- A bucket to host your html file
  S3BucketWebHelloWorld:
    Type: AWS::S3::Bucket
    DeletionPolicy: Delete
    Properties:
      BucketName: !Ref S3BucketNameWeb
      AccessControl: Private
      PublicAccessBlockConfiguration:
        BlockPublicAcls: false
        BlockPublicPolicy: true
        IgnorePublicAcls: true
        RestrictPublicBuckets: true
      WebsiteConfiguration:
        IndexDocument: index.html
        ErrorDocument: error.html
      BucketEncryption:
        ServerSideEncryptionConfiguration:
          - ServerSideEncryptionByDefault:
              SSEAlgorithm: AES256
📝 You can enable versioning but you will need to empty your bucket before destroying your stack.
As you can see, there is a “reference” using the function !Ref on the input parameter S3BucketNameWeb you defined before.
- A bucket to log all the request on your cloudfront distribution ( optional )
S3BucketLogging:
    Type: AWS::S3::Bucket
    DeletionPolicy: Delete
    Properties:
      BucketName: !Sub bucket-${AWS::AccountId}-${AWS::Region}-logging-webapp
      AccessControl: Private
      PublicAccessBlockConfiguration:
        BlockPublicAcls: true
        BlockPublicPolicy: true
        IgnorePublicAcls: true
        RestrictPublicBuckets: true
      BucketEncryption:
        ServerSideEncryptionConfiguration:
          - ServerSideEncryptionByDefault:
              SSEAlgorithm: AES256
On this section, you can see a new function “!Sub”, which will substitutes variables in an input string with values that you specify and it’s using pseudo parameter AWS::AccountId and AWS::Region which are basically parameter predefined by AWS CloudFormation.
The parameter has to be between ${} .
- One CloudFront Origin Access Identity to limit access to your bucket only from the cloudfront distribution
  CloudFrontOriginAccessIdentity:
    Type: AWS::CloudFront::CloudFrontOriginAccessIdentity
    Properties:
      CloudFrontOriginAccessIdentityConfig:
        Comment: 'origin identity s3 webapp'
- One bucket policy to define this limitation on your bucket
 S3HostingBucketPolicy:
      Type: AWS::S3::BucketPolicy
      Properties:
        Bucket: !Ref S3BucketNameWeb
        PolicyDocument:
          Statement:
            - Action:
                - 's3:GetObject'
              Effect: Allow
              Resource: !Join
                - ''
                - - 'arn:aws:s3:::'
                  - !Ref S3BucketNameWeb
                  - /*
              Principal:
                CanonicalUser: !GetAtt CloudFrontOriginAccessIdentity.S3CanonicalUserId
- A CloudFront Distribution which will define the settings for your cloudfront
CloudFrontDistributionWebApp:
    Type: 'AWS::CloudFront::Distribution'
    Properties:
      DistributionConfig:
        CustomErrorResponses:
          - ErrorCode: 404
            ResponseCode: 404
            ResponsePagePath: "/error.html"
        DefaultCacheBehavior:
          AllowedMethods:
            - GET
            - HEAD
          CachedMethods:
            - GET
            - HEAD
          Compress: true
          # TTL very low for testing purpose
          DefaultTTL: 30 # in seconds
          ForwardedValues:
            Cookies:
              Forward: none
            QueryString: false
          MaxTTL: 40 # in seconds
          MinTTL: 20 # in seconds
          TargetOriginId: S3-private-bucket
          ViewerProtocolPolicy: "redirect-to-https"
        DefaultRootObject: 'index.html'
        Comment: "CDN for Micro-WebApp"
        Logging:
          Bucket: !Sub '${S3BucketLogging}.s3.amazonaws.com'
          Prefix: "cloudfront-webapp"
        Enabled: true
        HttpVersion: http2
        ViewerCertificate:
          CloudFrontDefaultCertificate: true
        Origins:
          - Id: S3-private-bucket
            DomainName: !GetAtt S3BucketWebHelloWorld.DomainName
            S3OriginConfig:
              OriginAccessIdentity: !Sub 'origin-access-identity/cloudfront/${CloudFrontOriginAccessIdentity}'
        # less expensive, serve only US, Canada, Mexico, EU and Israel
        PriceClass: PriceClass_100
You can see the final version on my github repo
Cloudformation will deploy everything automatically and in the correct order as there is reference in resource of other resource.
You can deploy from the GUI directly and fill the bucket name parameter or you do everything from CLI.
We will use Gnu MakeFile to:
- Test the code with cfn-lint and cloudformation validate-template
- Deploy/destroy/Troubleshoot
- Upload our file on S3 and delete them when destroy
vim Makefile

SHELL := /bin/bash
AWS_PROFILE := devopshandson
STACKNAME := web-hosting-hello-world
REGION := eu-west-3
S3BUCKET := static-web-hello-world-micro-project
S3BUCKETLOG := bucket-${ACCOUNT}-${REGION}-logging-webapp
TEMPLATE_FILE := website-helloworld.yml
ENVIRONMENT := test
OWNER := jusi

deploy:
	make lint
	aws cloudformation deploy --stack-name ${STACKNAME} --template-file ${TEMPLATE_FILE} --tags environment=${ENVIRONMENT} owner=${OWNER}
	aws cloudformation describe-stacks --stack-name ${STACKNAME}
	make sync

sync:
	aws s3 sync ./ s3://${S3BUCKET} --exclude '*' --include "*.html"

clean:
	aws s3 rm --recursive "s3://${S3BUCKET}"
	aws s3 rm --recursive "s3://${S3BUCKETLOG}"
	aws cloudformation delete-stack --stack-name ${STACKNAME}
	aws cloudformation describe-stacks --stack-name ${STACKNAME}

plan:
	 aws cloudformation deploy --stack-name ${STACKNAME} --template-file ${TEMPLATE_FILE} --tags environment=${ENVIRONMENT} owner=${OWNER} --no-execute-changeset

output:
	aws cloudformation describe-stacks --stack-name ${STACKNAME}
	aws cloudformation describe-stack-events --stack-name ${STACKNAME}

error:
	aws cloudformation describe-stack-events --stack-name ${STACKNAME}  | jq '.StackEvents[] | select(.ResourceStatus == "DELETE_FAILED")'
	aws cloudformation describe-stack-events --stack-name ${STACKNAME}  | jq '.StackEvents[] | select(.ResourceStatus == "CREATE_FAILED")'

lint:
	cfn-lint ${TEMPLATE_FILE}
	aws cloudformation validate-template --template-body file://${TEMPLATE_FILE}

install:
	@which jq || ( which brew && brew install jq || which apt-get && apt-get install jq || which yum && yum install jq || which choco && choco install jq)
	@which aws || pip3 install awscli || pip install awscli
Using the makefile in the directory, we will be able to launch easily few commands in one run and we can define different parameter in the command line.
make deploy ENVIRONMENT="prod" OWNER="superman"
Before deploying, don’t forget to have your html file define in the template in your current directory.
Here is one very simple html file:
vim index.html
<!DOCTYPE html>
<html lang=“en”>
<head>
<meta charset=“UTF-8”>
<meta name=“viewport” content=“width=device-width, initial-scale=1.0”>
<title>The Amazing website of JuSi </title>
</head>
<body>
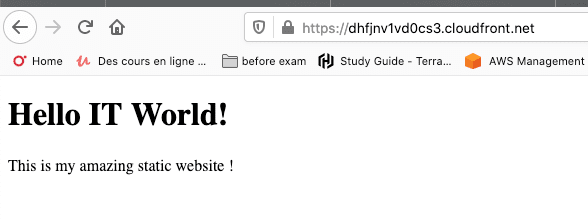
<h1>Hello IT World!</h1>
<p>This is my amazing static website ! </p>
</body>
</html>
The code will be test/lint before each deployment using cfn-lint and validate-template.
If you want to test your code:
make lint
📝 You will need cfn-lint installed to test your code.
You can have a look on my post about improving your Cloudformation coding experience
When you want to clean all your infrastructure, easy, you will just need to use this command:
make clean
It will delete all files in the directory and all your infrastructure.
Once, you had deployed your website, you will be able to see from the cloudfront Url:
But not directly from your S3 bucket URL:
And that’s it! Hope you like this article and that it will help you to start with Cloudformation.
Thanks for reading, Happy Clouding! 😄